

01 / 02
Turn Your Scripts and CLIs into AI-Native Tools with Skills
My AWS Community Day Guatemala 2026 talk: how to give an AI agent a short guide to the scripts and CLIs you already have, with pokecli as the demo.
On this page
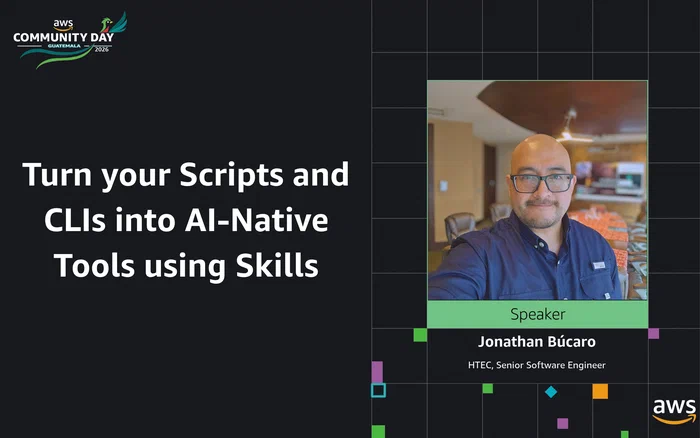
I opened my talk at AWS Community Day Guatemala 2026 with a question that, coincidentally, was very similar to the one the event’s keynote had opened with:
Who has felt that, if they aren’t building an MCP server or using a giant Agent Framework, they’ve already fallen behind?
I told the room that feeling some FOMO is natural when it seems like everyone is already doing it, but there’s no need to worry about it, because you can start with what you already have. To prove it, I asked the audience what we do when production goes down, and the answers were the usual ones: tail a log, run a query, put together a script. Nobody said they’d sit down and build an agent.
That’s what the talk was about. The scripts and CLIs you already have can become tools an agent uses, and usually the only thing missing is a short guide (a SKILL.md) that explains to the agent when to use them and how. This page is the written version of the talk, which I gave in Spanish, along with pokecli, the CLI I used for the demo. It all started as an internal talk at work called Make Your CLI Tools AI-Native with SKILL.md, and the feedback I got made it clear that people needed a practical example they could inspect and reuse, so I built pokecli.
What the agent does and what the script does #
Today, when something breaks, a lot of us paste half a log into a chat, the model answers something like “I think the error is…”, and then we have to go check whether it’s right. In practice we’re asking the model to calculate things that should have been programmed, and that has a cost: the answer changes from run to run, the model only sees part of the context, and when it fills the gaps it can make things up.
What I proposed in the talk is a better split of the work. The agent decides what to run and when, a deterministic CLI does the work and returns structured output, and the agent builds its answer from that output. The SKILL.md is the manual that connects the two, and you don’t need a server or any new infrastructure for it.
The agent decides, the script executes.
Before touching any code, it’s worth writing down 2 or 3 real use cases. For each one I note what the user would say, the steps it takes, and the result I expect. This is the one I used in the talk:
Use case: Orders report per customer
Trigger:  "how many orders did customer X have?"
          "sales report for this month"
Steps:
  1. report orders --user-id X --from ... --format json
  2. Calculate totals / compare periods
Result:   Real numbers + the command that was used
That exercise saves you work later, because almost all of it carries straight into the skill: the parameters end up as flags, the user’s phrases feed the trigger, and the steps turn into examples. You already have the tool, what the skill adds is knowing when and how to use it.
The four pillars #

I boiled the process down to four pillars, and they work the same for a Python script, a Node CLI, or a bash wrapper around an internal API.
1. A deterministic CLI #
Most scripts start like this, with everything hardcoded:
# report.py
conn = connect("prod-db.internal")
rows = query("SELECT * FROM orders WHERE user_id = 4821")
print(rows)
An agent can’t do much with that. The first step is turning every value that changes into a flag, including the environment and the output format:
report orders \
  --user-id 4821 \
  --env prod \
  --format json
That change is roughly 80% of the work. A CLI that works for an agent is the same one that would work for you in a pipeline, so this list will probably look familiar:
A CLI an agent can use
- Every value that changes is an argument or a flag.
- Errors are actionable and say which values are accepted.
- Output is structured, for example
--format json|table|csv. - Data goes to stdout, logs and errors go to stderr.
- Exit codes mean something:
0ok,1error,2wrong usage. - Nothing is interactive, because a prompt waiting for input leaves the agent hanging.
- Anything that deletes or modifies data gets
--dry-runor--yes, so nobody runs a DELETE in prod over a misunderstanding.
And please, don’t write the argument parsing by hand. In Python you have Typer, Click, or argparse, and in Node, Commander.js, yargs, or oclif. Distributing it is one command too: uv tool install for Python or npm i -g for Node. With Typer, the report command above ends up as a plain function:
@app.command()
def orders(user_id: int, env: str = "dev", format: str = "table"):
    ...
2. A description the agent can find #
To decide whether to use your skill, the agent reads the description, not your code. It’s the one frontmatter field that’s always loaded, and the agent uses it to decide whether the skill applies to what it’s being asked. Look at the difference between these two:
# Too vague
description: Reporting tool.

# Useful
description: Generates order, sales, and user reports from the platform database. Use it when the user asks for metrics, reports, totals by date, or information about a specific customer that the platform doesn't show.
The description works like SEO for your tool, except the reader is an agent. Anthropic’s guide to building skills ➡️ has the rules I follow:
- It says what the tool does, when to use it, and what its main capabilities are.
- It includes phrases a user would really say, and file types if they’re relevant.
- It’s under 1024 characters and has no
<or>, because it ends up inside the system prompt. - The
nameis kebab-case, matches the folder name, and doesn’t include “claude” or “anthropic”. - If the skill fires where it shouldn’t, it carries negative triggers like “Do NOT use for general finance questions”.
3. Examples that show the way #
Examples teach the agent how your tool gets used. Each one has three parts: the request a user would make, the exact command with its flags, and the expected output, so the agent can tell when something went wrong.
## Examples

**User:** "How many orders did customer 4821 have this month?"

    report orders --user-id 4821 --from 2026-09-01 --format json

**Expected output:**

    {"user_id": 4821, "total_orders": 12, "total_amount": 3450.00}
It’s also worth documenting what to do when something fails, with the error, the cause, and the fix:
## Troubleshooting

**Error:** exit 2, "user not found"
**Cause:** the ID doesn't exist in that environment
**Fix:** confirm the ID with the user and check which --env was used
The instructions need to be specific. If you write “Validate the data before continuing”, the agent is left guessing what validating means. “Run report validate --input file.csv, and if it fails, check that dates are YYYY-MM-DD and the required fields are present” gives it something concrete to do instead. Anthropic’s guide sums it up in a line I also used in the talk:
Code is deterministic; language interpretation isn’t.
Anthropic ➡️
4. Everything packaged in SKILL.md #
A skill is just a folder with a SKILL.md inside:
.claude/skills/
└── orders-report/
    ├── SKILL.md       # required
    ├── scripts/       # your CLI or wrappers
    ├── references/    # docs loaded on demand
    └── assets/        # templates, schemas
Put it in ./.claude/skills if it’s for one project, or in ~/.claude/skills if you want it available in all of them. Watch out for a few details that tend to trip people up: the file has to be named exactly SKILL.md, the folder is kebab-case (orders-report, never Orders Report or orders_report), and the README goes at the root of your repo, outside the skill folder.
What makes this scale is progressive disclosure, meaning the agent loads the skill in layers:
- The frontmatter
nameanddescriptionare always loaded, which is just enough to decide whether the skill applies. - The
SKILL.mdbody loads when the skill fires, which is why it should stay under 5,000 words. - Files in
references/load only when the agent needs them, and anything inscripts/gets executed without entering the context at all.
For a CLI skill I’d always add the optional allowed-tools field. In pokecli it looks like this:
allowed-tools: Bash(pokecli:*)This tells Claude Code that the skill can only run pokecli commands, so it also works as a safety boundary. By the way, I didn’t invent this structure, I took it from Microsoft’s Playwright CLI ➡️
skill, which has a short description, a focused body, and leaves the extra detail in reference files.
Quick start with pokecli #
pokecli is the CLI I built for the demo. It’s written in typed Python, queries PokeAPI, and covers Pokémon, moves, abilities, items, types, and evolutions, with a local cache so repeat lookups don’t hit the network. Here’s how to install it along with the skill.
Install the CLI with uv
#
uv to be installed on your machine first. To install uv, you can follow the guide on the Astral site ➡️
.uv tool install git+https://github.com/jebucaro/pokecliInstall the Claude skill #
pokecli install --skills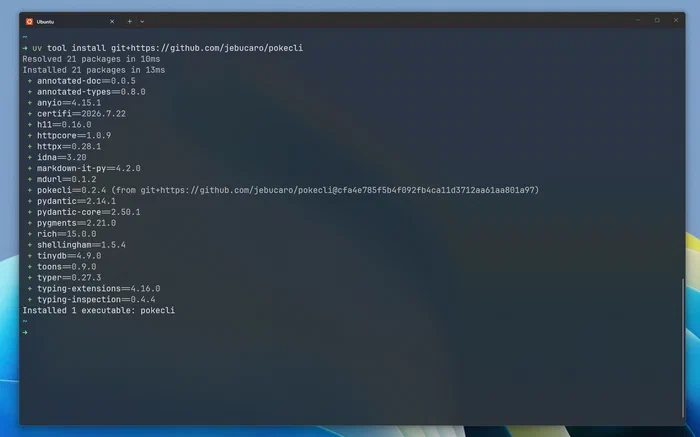
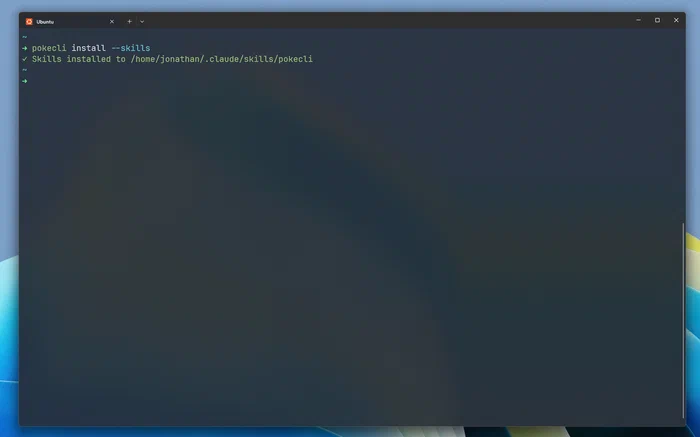
The install --skills command doesn’t generate anything new: the SKILL.md and its reference files ship inside the package, and all it does is copy them into ~/.claude/skills/pokecli/, so you don’t need the repo checked out. You could copy the files by hand, but I added the command so the example is easy to try.
All 18 resources use the same three commands (get, list, and search), and there are six task commands, like moves, can-learn, and sprite, for questions that a single record can’t answer. Knowing that structure is enough for the skill to find the right command.
Once it’s installed, Claude Code knows when to reach for pokecli and which command answers each kind of question:
pokecli up close #
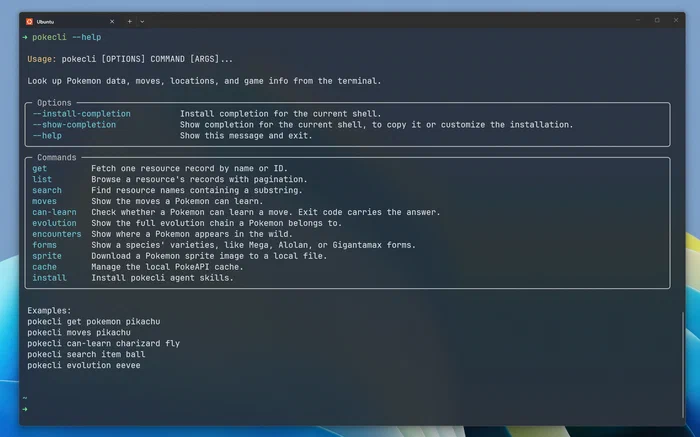
The SKILL.md in the repo is 192 lines, and you can see all four pillars in it. These are the parts worth a closer look.
Frontmatter and the whole grammar #
---
name: pokecli
description: Queries Pokemon, moves, items, abilities, types, locations, game data, forms, machines, encounters, evolutions, and other PokeAPI-backed resources via the pokecli CLI. Use when the user needs Pokemon stats, move info, type matchups, catch locations, evolution chains, sprite downloads, regional or generation data, or cache management. Also use when the user mentions pokecli, pokedex, or PokeAPI.
allowed-tools: Bash(pokecli:*)
user-invocable: false
---
The description carries the tool’s purpose and the phrases a user might type, like pokedex, Pokemon stats, or download sprites. Then the body opens with every command the agent will ever need, on one screen:
## The whole grammar

Three patterns cover every resource:

    pokecli get <resource> <name_or_id>     # one record
    pokecli list <resource>                 # browse, paginated
    pokecli search <resource> <query>       # find a name

Plus six commands that answer a question rather than return a record:

    pokecli moves <pokemon>                 # every learnable move
    pokecli can-learn <pokemon> <move>      # exit 0 = yes, exit 1 = no
    pokecli evolution <pokemon>             # full chain, from any member
    pokecli encounters <pokemon>            # where it appears in the wild
    pokecli forms <pokemon>                 # Mega, Alolan, Gigantamax varieties
    pokecli sprite <pokemon> -o <path>      # download an image

There is exactly one command path per behavior. No aliases, no nested groups.
With that in context, the agent doesn’t need to run --help to find a command, and it never has to pick between two ways of asking for the same thing.
TOON output #
pokecli decides its output format based on who’s going to read it. In a terminal you get Rich tables, but that markup burns tokens, just like all of JSON’s punctuation. So when the output is captured (which is what happens when an agent runs it), pokecli prints TOON, a compact notation that takes roughly 40% less space than JSON. The skill asks the agent to leave --format alone and use --format json only when it needs to count, sum, or filter. This is how it describes the output:
## Reading the default output

This is what you get with no `--format` (TOON):

- A single record is `label:` followed by indented `key: value` pairs
- A collection is `label[count]{fields}:` followed by indented rows
- Aggregates like `count`, `total_moves`, `methods` appear as top-level keys
- Every response ends with `help[]` hints naming valid follow-up commands
The help[] hints are what I like most. pokecli get pokemon pikachu ends with help[3]: pokecli moves pikachu,pokecli evolution pikachu,pokecli encounters pikachu, so the output itself suggests the agent’s next command. TOON exists because of the skill: when I wrote a rule about token cost, I realized the tool didn’t have any output format worth recommending.
One command path per behavior #
pokecli pokemon get pikachu, pokecli move get thunderbolt), older non-nested groups kept around as hidden commands, and short aliases for humans like pokecli pokemon pikachu. Every one of those worked, so the skill needed an extra rule telling agents which form to prefer, plus a list of the aliases so the agent would recognize them.In v0.2 I consolidated the CLI into get, list, and search for all 18 resources, plus six task commands, and dropped the aliases:
# before
pokecli pokemon get pikachu
pokecli pokemon pikachu          # alias
pokecli move get thunderbolt

# v0.2
pokecli get pokemon pikachu
pokecli get move thunderbolt
There’s one way to ask for each thing now, so the rule about preferring canonical commands disappeared from the skill, and the agent has fewer ways to get it wrong.
Here’s a real session in Claude Code, where I asked for Pikachu’s stats and then for a comparison of Thunderbolt and Flamethrower:
When is a skill done? #
A skill is done when you’ve tested it, and there are two things to test. The first is triggering: the skill should load for obvious requests and for paraphrases, and stay out of the way for unrelated ones. A good goal is getting around 90% right across 10 to 20 phrases. For pokecli, the phrases could look like this:
Should trigger
- “Look up Pikachu’s stats”
- “Show me berry data from PokeAPI”
- “Download a sprite for Charizard”
- “Compare Thunderbolt and Flamethrower”
Shouldn't trigger
- “Help me write a Python class”
- “What is the weather today?”
- “Summarize this meeting transcript”
The second is behavior, which you test by running real commands and checking the outputs, the errors, and the edge cases:
pokecli get pokemon pikachu
pokecli can-learn pikachu thunderbolt
pokecli get item master-ball --format json
pokecli sprite 25 -o /tmp/pika.png
pokecli cache clear --resource pokemon
If these work, you know the skill’s examples match what the tool actually does. Run the first one in your terminal and then again piped through cat, and you’ll see the output switch from Rich tables to TOON.
When something goes wrong, the symptom usually tells you what to fix. If the skill doesn’t load, the description is missing keywords, and if it loads for requests that have nothing to do with it, it needs negative triggers. When results change from one run to the next, it’s the instructions that need work. A debugging trick that works for me is to ask the agent “When would you use the pokecli skill?” and read what it understood.
Before calling a skill finished, I run through this list:
Skill checklist
- 2 or 3 concrete use cases written down
- A kebab-case folder with a file named exactly
SKILL.md - Frontmatter between
---lines, with a kebab-casename - A
descriptionthat says what and when, under 1024 characters, with no<or> - Actionable instructions, examples, and troubleshooting
- Reference files linked from
SKILL.md - Tested with obvious requests, paraphrases, and unrelated topics
Your homework #
At the end of the talk I gave the room this homework for Monday:
- Pick a script you use every week.
- Move the hardcoded values into flags and add JSON output.
- Write a
descriptionthat says what it does and when to use it. - Add 2 or 3 examples with their expected output.
- Save it as
SKILL.mdand try it with your agent.
If you don’t have a script handy, use pokecli and write the skill yourself. First remove the skill if you installed it with the CLI (you can reinstall it later with pokecli install --skills):
rm -rf ~/.claude/skills/pokecliThen create a folder for the exercise, with the path where Claude will look for the local skill:
mkdir -p pokecli-skill-lab/.claude/skills/pokecli
cd pokecli-skill-lab
Inside that folder, create ./.claude/skills/pokecli/SKILL.md, then start Claude from the same directory so it picks up the local skill:
claudeDon’t worry about getting the file perfect the first time. Start with the frontmatter and a few commands, try a prompt like “Use pokecli to look up Pikachu’s stats”, then clear the context and try again without mentioning pokecli. Watch what Claude gets wrong. If it skips a command, add it, and if it uses the wrong flags, add an example that works. If it ends up using generic shell commands, tighten the description. When you’re happy with it, compare your file with the one pokecli ships.
I closed the talk by saying nobody fell behind, because the scripts you already wrote are exactly what an agent needs to do real work. What they’re missing is what we covered here: being deterministic, having a good description, a few examples, and a SKILL.md that ties it all together.
Which script are you going to convert first? Message me on LinkedIn ➡️ and tell me how it went.
Photo by Jay ➡️ on Unsplash ➡️
Photo by davide ragusa ➡️ on Unsplash ➡️
Pokémon and Pokémon character names are trademarks of Nintendo.