

Why this matters #
Moving your development into Dev Containers gives you flexibility and isolation, but it breaks the standard “WSL mount” configuration for 1Password if your Dev Containers are created inside WSL. This guide bridges the 1Password SSH agent from Windows into your containers using a network socket, so biometric Git signing works everywhere without leaking private keys.
Modern Windows development has reached a sweet spot: the native Linux performance of WSL2 combined with the clean, reproducible isolation of Dev Containers. But that multi-layered architecture often leaves security credentials stranded, and bridging 1Password into the stack lets you use the biometric hardware of your Windows machine (Windows Hello) to authenticate inside isolated Linux environments, without scattering private keys across virtual filesystems.
The problem #
If you work strictly in WSL2, it’s tempting to point your .gitconfig at the Windows 1Password binary via the /mnt/c/ mount. That works on the surface, but it’s brittle and breaks the moment you move toward a containerized workflow:
- Referencing
op-ssh-sign.exedirectly in your WSL.gitconfigworks locally, but that path does not exist inside a Dev Container. - Containers are isolated by design, they don’t have access to your Windows host’s filesystem mounts or its named pipes.
- Different dev environments have different mount points, which makes hardcoded paths a maintenance headache.
The solution #
Using socat and npiperelay, you create a Unix socket that bridges your Linux environment to the Windows 1Password agent. That gets you biometric signing for commits and pushes to GitHub, GitLab, or Azure DevOps through Windows Hello, no private keys stored in ~/.ssh/ on Linux, vault isolation (1Password only shares the keys you choose to expose to the agent), and one Git configuration that works the same on Windows, WSL, and inside any Dev Container.
To see how the pieces fit together:
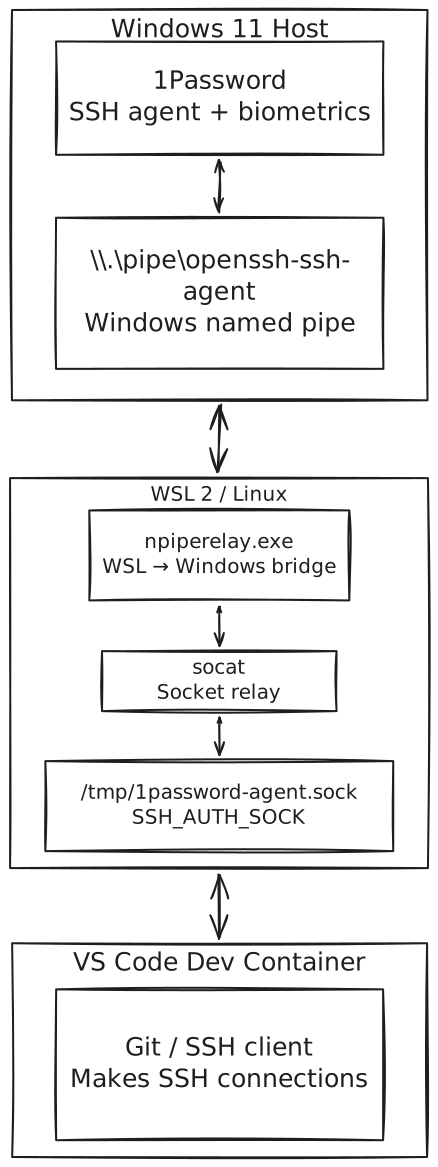
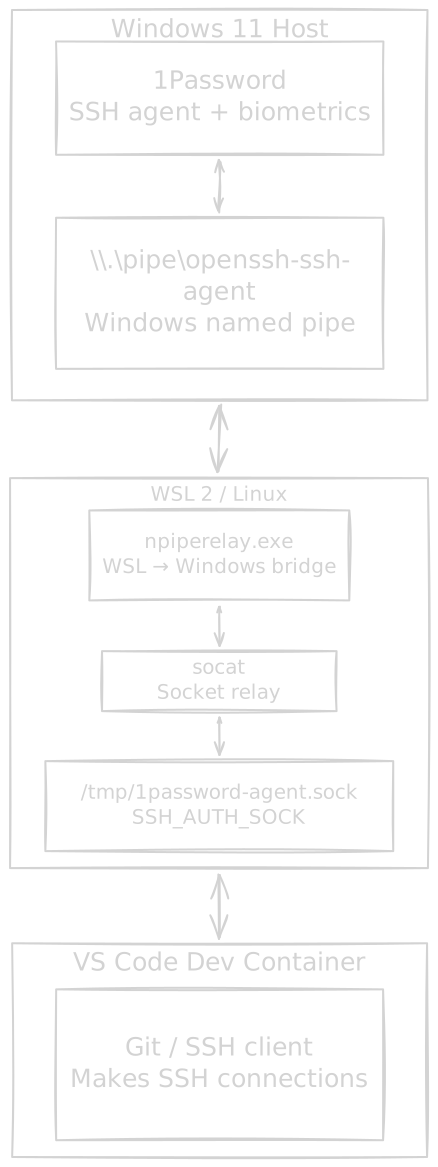
System Architecture
Quick start #
Prerequisites #
- Git for Windows installed and you have configured your global user name and email ➡️
- 1Password 8+ for Windows (with Windows Hello configured).
- WSL 2 with
systemdenabled. If you installed Ubuntu viawsl --install, systemd is enabled by default; otherwise follow the official documentation ➡️ . npiperelay.exedownloaded and added to your Windows%PATH%. Follow the instructions in the npiperelay ➡️ repo, or download the release ➡️ and unzip it somewhere on your%PATH%. This tutorial creates abinfolder inside the Windows home folder and extractsnpiperelay.exethere.
Step 1: configure the Windows host #
In 1Password, go to Settings > Developer and check Use the 1Password SSH agent, following the official 1Password guide ➡️ .
Security tip: under the agent settings, you can restrict access to specific vaults so personal keys aren’t exposed to your dev environment. See the official agent config file docs ➡️ .
Open a Windows PowerShell and verify the agent is working:
ssh-add -lIf you see your keys, the host layer is ready.
Step 2: create the WSL bridge #
Install socat in WSL to handle the socket relay:
sudo apt update && sudo apt install socat -yCreate the local user directory for systemd services if it doesn’t already exist:
mkdir -p ~/.config/systemd/user/Create the service file that starts the bridge whenever you log into WSL. Replace [username] with your actual Windows username:
cat <<EOT > ~/.config/systemd/user/1password-ssh-agent.service
[Unit]
Description=Bridge 1Password SSH Agent from Windows

[Service]
Type=simple
ExecStart=/usr/bin/socat -d -d UNIX-LISTEN:"/tmp/1password-agent.sock",fork EXEC:"/mnt/c/Users/[username]/bin/npiperelay.exe -ei -s //./pipe/openssh-ssh-agent",nofork
ExecStop=rm -f /tmp/1password-agent.sock
Restart=Always

[Install]
WantedBy=default.target
EOT
Reload the systemd manager, then enable and start the bridge:
systemctl --user daemon-reload
systemctl --user enable --now 1password-ssh-agent.service
Confirm the bridge created the Unix socket:
ls -la /tmp/1password-agent.sockFor ssh-add and Git to find the bridge, set the SSH_AUTH_SOCK environment variable in your shell profile (~/.bashrc or ~/.zshrc). You can append it automatically:
# This appends the export line safely to the end of your profile
echo 'export SSH_AUTH_SOCK=/tmp/1password-agent.sock' >> ~/.bashrc
Or add this line manually to the end of your profile file:
export SSH_AUTH_SOCK=/tmp/1password-agent.sockThen reload your profile:
# For Bash
source ~/.bashrc

# For Zsh
source ~/.zshrc
Step 3: configure Git signing and verification #
For Git to sign and verify signatures locally, not just on GitHub, you need an “Allowed Signers” file and a signing key that matches what 1Password provides.
Run ssh-add -L in WSL and copy the public key string (for example ssh-ed25519 AAA...). It must match your Git config for signing to work:
git config --global gpg.format ssh
git config --global user.signingkey "YOUR_SSH_ED25519_PUBLIC_KEY_STRING"
git config --global commit.gpgsign true
Create the allowed signers file so Git can verify your own signatures locally. Replace the email and key with your own:
# Add yourself to the allowed signers
echo "$(git config --global user.email) YOUR_SSH_ED25519_PUBLIC_KEY_STRING" > ~/.ssh/allowed_signers
git config --global gpg.ssh.allowedSignersFile ~/.ssh/allowed_signers
Finally, create $HOME/.ssh/config with agent forwarding configured:
Host *
  ForwardAgent yes
  IdentityAgent /tmp/1password-agent.sock
How it works #


Authentication Flow
Verifying results #
To check if your setup is signing and verifying correctly, create a commit and run:
git log --show-signature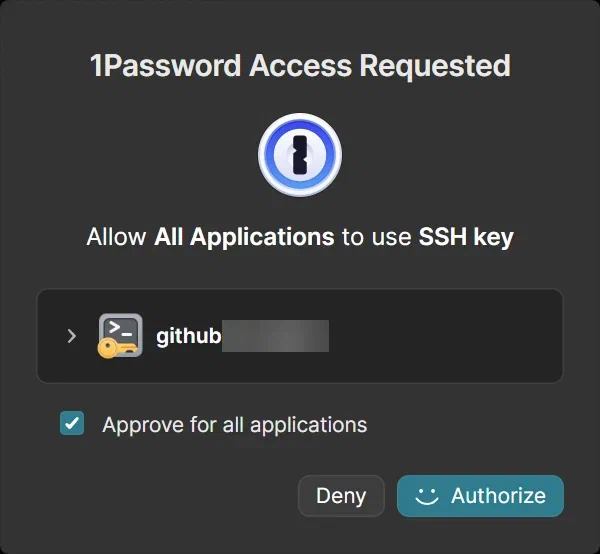
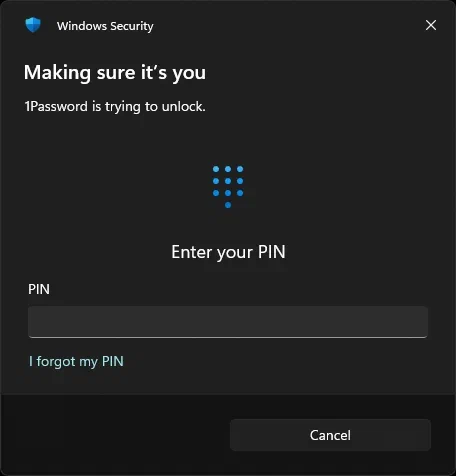
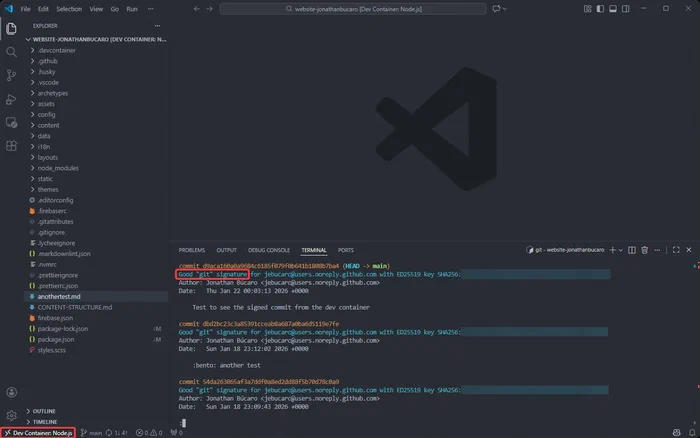
You should see: Good "git" signature for [email] with key ...
Photo by Cosmin Andrei Buzamat ➡️ on Unsplash ➡️
Inspired by Marius Boden’s article Elevate Your Git Security: Signing GitHub Commits with 1Password in Windows WSL and Containers ➡️ on Xebia ➡️