
Customizing your terminal can make a huge difference in your productivity and comfort as a developer. One of the most popular tools to personalize the prompt on Windows is Oh My Posh, which allows you to add attractive visual themes and extra features in both PowerShell and Windows Terminal.
In this article, I’ll walk you through step-by-step how to transform your Windows terminal with Oh My Posh. Don’t worry if you’ve never customized anything before, I’ll take you from installing PowerShell all the way to making your terminal look completely different.
Install PowerShell #
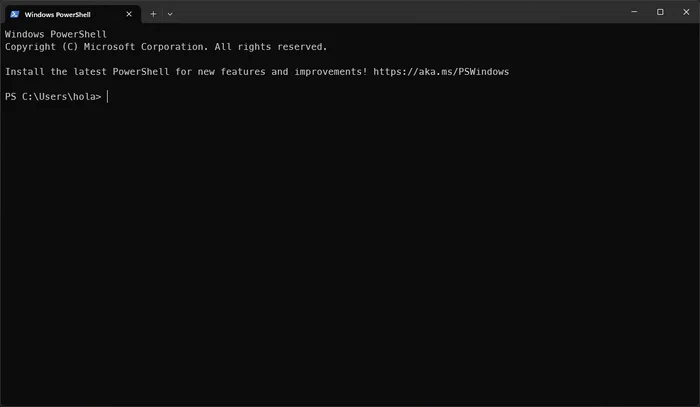
Are you still using the old version of PowerShell that comes with Windows? To fully benefit from Oh My Posh, it’s essential to have the latest cross-platform version.
My favorite way to install PowerShell is with Winget because it’s fast and easy, but you can also get it from the Microsoft Store ➡️ . Your choice!
From a Windows PowerShell window, run:
winget install Microsoft.PowerShell -s wingetConfigure Windows Terminal #
Since the Windows 11 22H2 update, Windows Terminal is the default terminal. If you don’t have it installed, you can easily install it via Winget or from the Microsoft Store ➡️ :
winget install Microsoft.WindowsTerminal -s wingetOnce it’s installed, continue with the setup below.
Set Windows Terminal as the default terminal application #
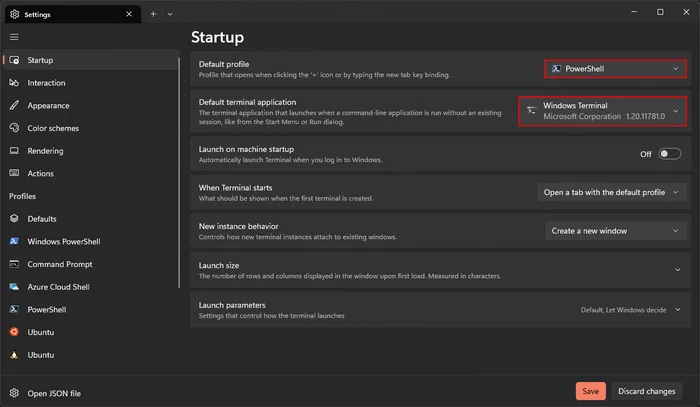
Open Windows Terminal, right-click on the title bar (outside the tabs) or click the down arrow next to the last tab and select “Settings.” You can also press Ctrl + , to open settings directly.
Find the Startup section. On the right, set PowerShell as the Default Profile and Windows Terminal as the Default Terminal Application, then click “Save.”
Configure PowerShell script execution policy #
PowerShell’s default policies control whether scripts or commands can run. On a Windows desktop, the policy is usually set to “Restricted,” which allows running single commands but not scripts. On Windows Server, the “RemoteSigned” policy lets you run local scripts and commands but requires downloaded scripts to be digitally signed.
For most cases, “RemoteSigned” is enough. Run this command in PowerShell:
Set-ExecutionPolicy RemoteSigned -Scope CurrentUser -ForceTo confirm it worked:
Get-ExecutionPolicyYou should see:
RemoteSignedInstall and configure Oh My Posh #
Oh My Posh is the star of this tutorial. It’s highly customizable, looks great, and has a large community behind it.
I recommend installing it via Winget, but it’s also available in the Microsoft Store ➡️ .
From PowerShell, run:
winget install JanDeDobbeleer.OhMyPosh -s wingetOnce installed, open a new PowerShell tab so everything loads properly.
Install a font #
Oh My Posh is designed to use Nerd Fonts. Nerd Fonts are popular fonts patched to include icons, so you need to install a Nerd Font to see the special icons in Oh My Posh.
First, browse the available fonts:
oh-my-posh font listThis prints one font name per line, so you can pipe it to search for something specific, for example oh-my-posh font list | findstr /i mono. Oh My Posh recommends the “Meslo” font family, which includes “Meslo LGM NF.”
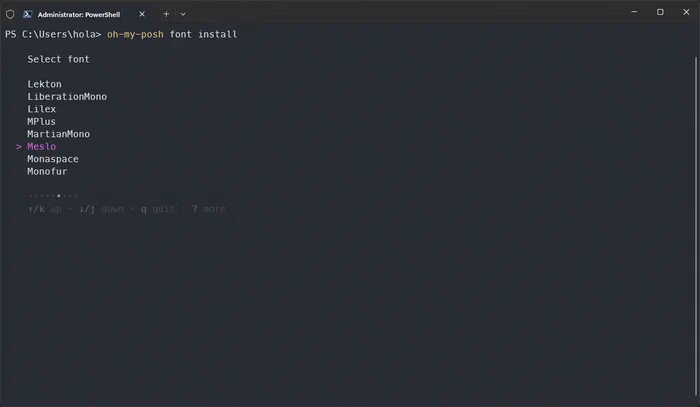
Once you’ve picked a name from the list, install it:
oh-my-posh font install mesloFonts always install for your current user, so there’s no need for an elevated terminal. You can also install directly from a URL or a local zip file, for example oh-my-posh font install https://example.com/font.zip.
Configure Windows Terminal to use a Nerd Font #
Open Windows Terminal’s settings JSON file by pressing Ctrl + Shift + , or via “Settings > Open JSON file”.
Find the “profiles” > “defaults” section and add this:
{
    "profiles": {
        "defaults": {
            "font": {
                "face": "MesloLGM Nerd Font"
            }
        }
    }
}
Save, and your terminal font will update.
Configure Visual Studio Code terminal to use a Nerd Font #
In Visual Studio Code, configure the integrated terminal to use the Nerd Font. Open settings (Ctrl + ,), search for “Integrated: Font Family”, and replace the value with MesloLGM Nerd Font.
Configure PowerShell to use Oh My Posh #
Let’s tell PowerShell to load Oh My Posh whenever you start a terminal.
Open your profile with your favorite editor, for example:
code $PROFILEAdd this line and save:
oh-my-posh init pwsh | Invoke-ExpressionReload your profile:
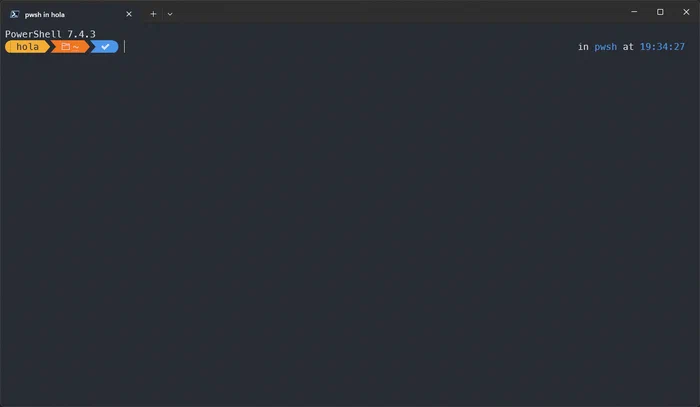
. $PROFILEDone! You should see your prompt change immediately to something like this:
Set a theme #
Oh My Posh comes with several built-in themes. You can explore them in the Oh My Posh themes documentation ➡️ .
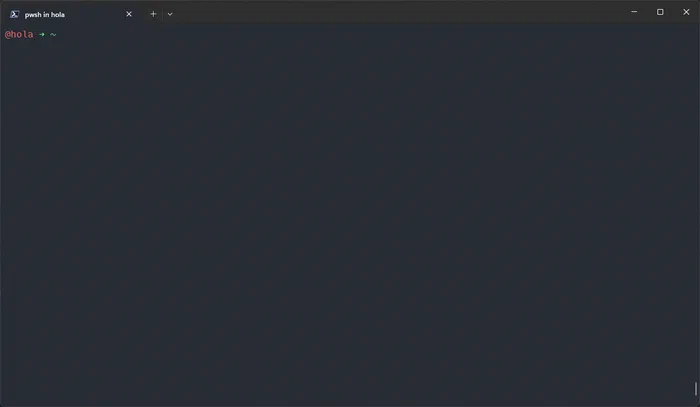
Pick one you like, then reference it by name (no extension) in your PowerShell profile line. For example, if you like the minimalist “zash” theme, update the line to:
oh-my-posh init pwsh --config "zash" | Invoke-ExpressionThis downloads and caches the theme on shell start, so you’ll need an internet connection the first time. If you’d rather keep a local copy to tweak, export it to a file instead:
oh-my-posh config export --config zash --output ~/zash.omp.jsonThen point your profile line to that file, --config "~/zash.omp.json".
Save and reload:
. $PROFILEEnjoy your new look!
If you want to revert to the default theme, just use:
oh-my-posh init pwsh | Invoke-ExpressionLevel up by installing these modules and apps #
PSReadLine #
If you want features common in bash, like syntax highlighting, history search, and key customization, PSReadLine is for you. It makes PowerShell’s command line editing more interactive and user-friendly.
Install the pre-release (more features, might have bugs):
Install-Module PSReadLine -AllowPrerelease -ForceOr the stable version:
Install-Module PSReadLineThen edit your PowerShell profile:
code $PROFILEAdd at the top of your profile:
Import-Module PSReadLine
Set-PSReadLineKeyHandler -Key UpArrow -Function HistorySearchBackward
Set-PSReadLineKeyHandler -Key DownArrow -Function HistorySearchForward
Set-PSReadLineKeyHandler -Key Tab -Function Complete
Save and reload:
. $PROFILEThe benefits of the configuration include:
- Syntax highlighting for commands and arguments
- Command history and tab completion
- Configurable keyboard shortcuts
- Search history with up/down arrows, respecting typed text
Ctrl + arrow keysto move by wordsCtrl + Lto clear the screen
Check key bindings with:
Get-PSReadLineKeyHandlerOfficial docs at the PSReadLine GitHub repo ➡️
winfetch #
winfetch is a PowerShell script that displays system information (OS, software, hardware) in a clean, readable layout.
To install:
Install-Script winfetchConfirm both prompts by pressing Y. Once installed, run:
winfetch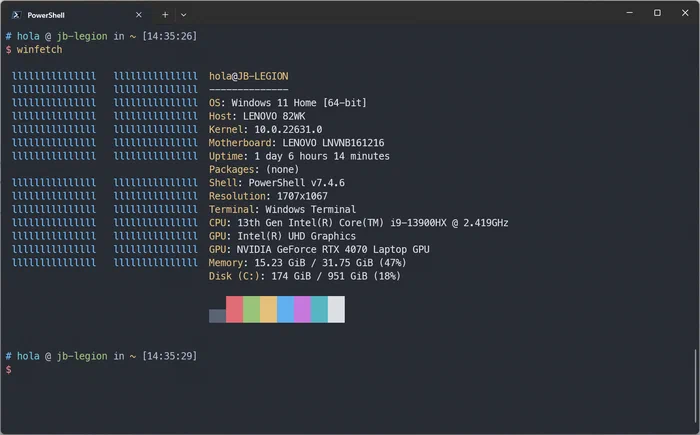
More info at the winfetch GitHub repo ➡️
bat #
bat is a clone of cat that adds syntax highlighting and Git integration.
Install with:
winget install sharkdp.bat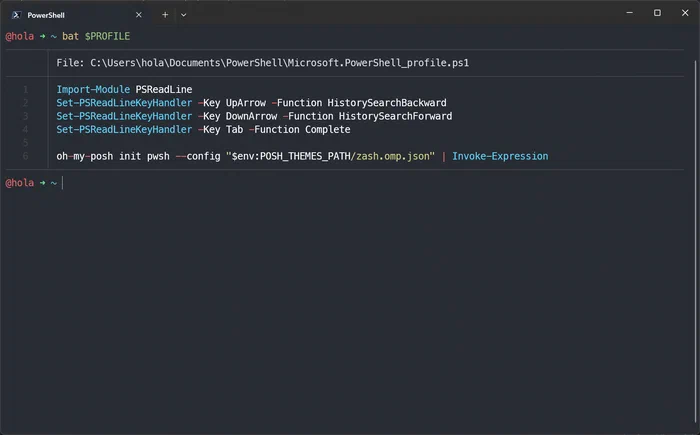
In Windows, install less as well for paging:
winget install jftuga.lessUsage and details at the bat GitHub repo ➡️ and the less-Windows repo ➡️ .
eza #
eza is a modern alternative to ls with colors, metadata, symlink recognition, and Git status support.
Install with:
winget install eza-community.ezaOpen a new PowerShell tab to start using it.
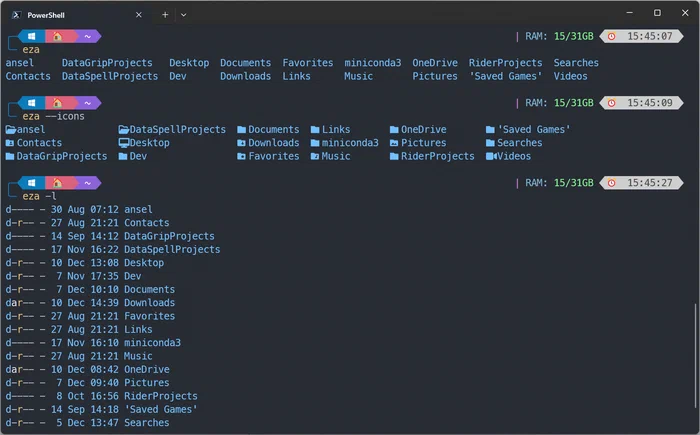
See options and docs at the eza GitHub repo ➡️ .
You now have a terminal that’s both powerful and good-looking, from a few config changes.
Keep exploring new themes, combos, and tools!
Icons showing as squares or not displaying? Make sure you’ve selected the Nerd Font in all your terminals. Sometimes you need to fully close and reopen apps for the font to apply.
Can’t run scripts?
Ensure you’ve changed the execution policy with Set-ExecutionPolicy RemoteSigned -Scope CurrentUser -Force and that you’re using PowerShell, not CMD or Windows PowerShell. System-wide installs may require admin rights.
Prompt not changing after setup?
Check that the Oh My Posh command is at the end of your $PROFILE file and that you have reloaded your profile (. $PROFILE). If you edited your profile but don’t see changes, run . $PROFILE manually.
Photo by Sunny Hassan ➡️ on Unsplash ➡️