
This is how I set up WSL2 on Windows today. I first installed it in 2020, when the process was different, so I’ve updated this guide to match how it works now. WSL (Windows Subsystem for Linux) lets you run Linux directly on Windows, and WSL2 is faster and works with more Linux apps than the first version.
Requirements #
You need at least Windows 10 version 2004 (the May 2020 Update) or Windows 11. You can check it in Settings > System > About, in the Windows specifications panel near the bottom.
WSL2 also needs hardware virtualization enabled in the BIOS, usually labeled Virtualization Technology or VTx.
Install #
Install WSL #
Everything installs with one command.
wsl --installIt enables everything WSL needs and installs Ubuntu by default. Restart your computer to finish.
To see which other distributions you can install:
wsl --list --onlineThe following is a list of valid distributions that can be installed.
Install using 'wsl.exe --install <Distro>'.
NAME FRIENDLY NAME
AlmaLinux-8 AlmaLinux OS 8
AlmaLinux-9 AlmaLinux OS 9
AlmaLinux-Kitten-10 AlmaLinux OS Kitten 10
AlmaLinux-10 AlmaLinux OS 10
Debian Debian GNU/Linux
FedoraLinux-42 Fedora Linux 42
SUSE-Linux-Enterprise-15-SP6 SUSE Linux Enterprise 15 SP6
SUSE-Linux-Enterprise-15-SP7 SUSE Linux Enterprise 15 SP7
Ubuntu Ubuntu
Ubuntu-24.04 Ubuntu 24.04 LTS
archlinux Arch Linux
kali-linux Kali Linux Rolling
openSUSE-Tumbleweed openSUSE Tumbleweed
openSUSE-Leap-15.6 openSUSE Leap 15.6
Ubuntu-18.04 Ubuntu 18.04 LTS
Ubuntu-20.04 Ubuntu 20.04 LTS
Ubuntu-22.04 Ubuntu 22.04 LTS
OracleLinux_7_9 Oracle Linux 7.9
OracleLinux_8_7 Oracle Linux 8.7
OracleLinux_9_1 Oracle Linux 9.1And to install a specific one:
wsl --install -d <DistroName>Set your username and password in Linux #
When the install finishes, open the distribution (Ubuntu by default) from the Start menu and create a username and password. A few things to know:
- They’re only for that distribution and have nothing to do with your Windows account.
- Nothing shows on screen while you type the password. That’s normal.
- This becomes the default user and logs in automatically when you open the distribution.
- It has administrator rights through
sudo. - Every distribution has its own users, so you create one each time you add, reinstall, or reset a distribution.
Change or reset your password #
To change your password, open the distribution and run:
passwdIt asks for your current password, then the new one twice.
If you forgot it:
- Open PowerShell and enter your default distribution as root:
wsl -u root- For a distribution that isn’t your default, use its name (Debian in this example):
wsl -d Debian -u root- As root, reset the password:
passwd <username>where <username> is the account you want to reset.
- Enter the new password twice, and when it confirms the change, leave WSL:
exitUpdate and upgrade packages #
Windows doesn’t update your Linux distributions for you, so do it yourself every now and then. On Ubuntu or Debian:
sudo apt update && sudo apt upgradeVisual Studio Code WSL Extension #
If you use VS Code, install the WSL extension ➡️ so you can open any folder inside WSL with all of VS Code’s features.
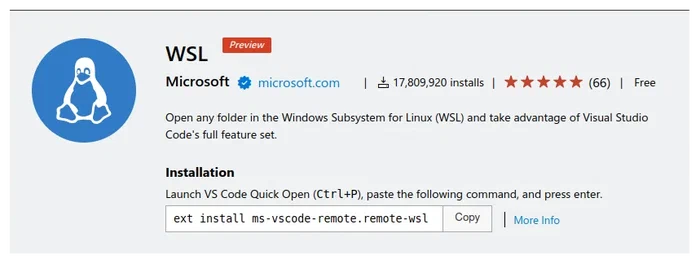
Restart VS Code after installing it. Then, from any folder in WSL, open it with:
code .WSL logo by Microsoft Corporation, Public domain, via Wikimedia Commons ➡️